Final Project (Food Project)
|
|
|
Description
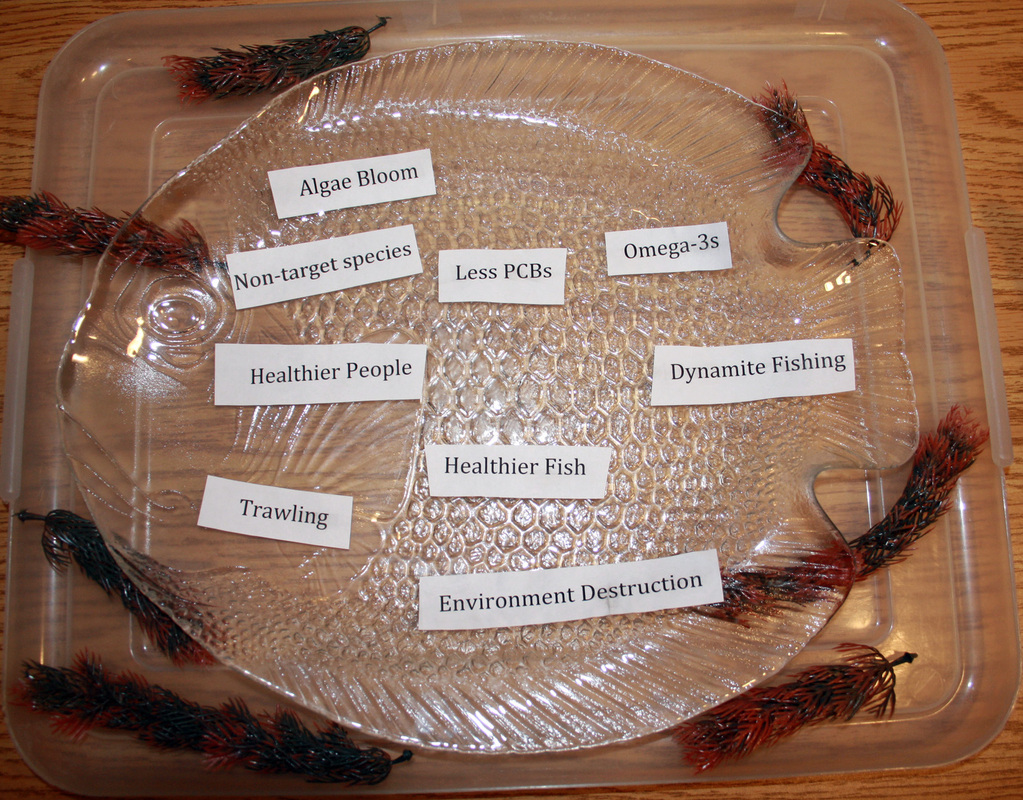
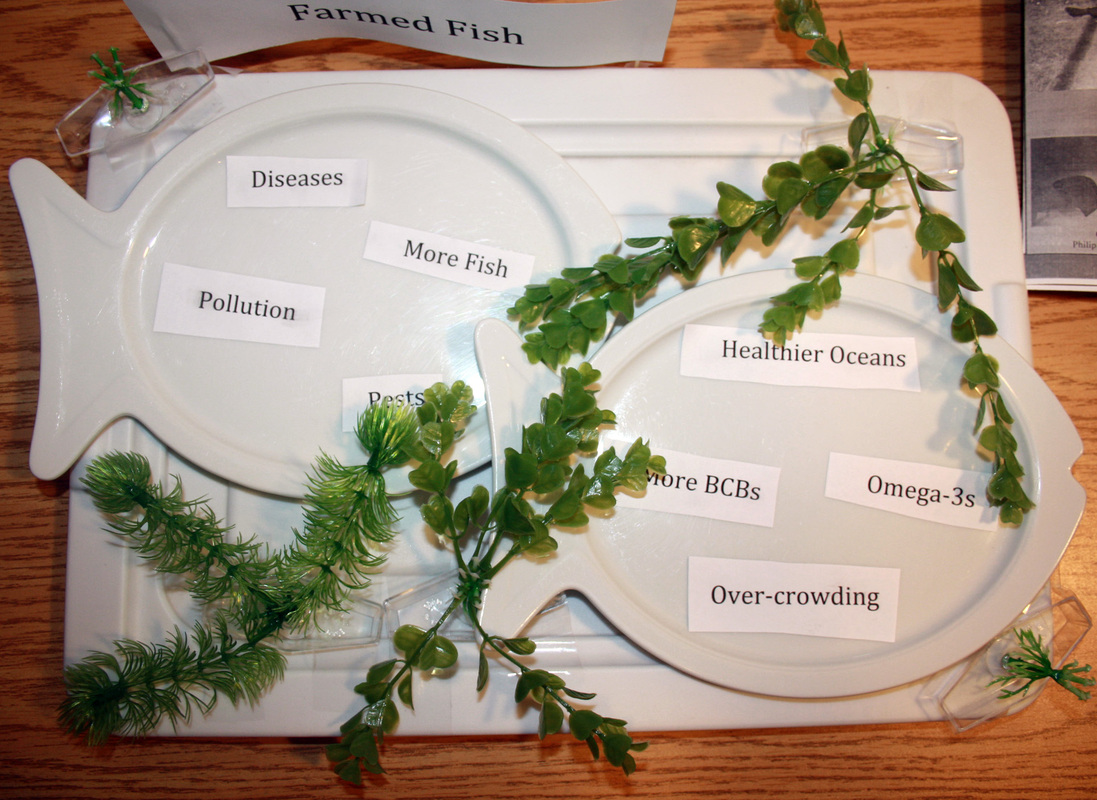
This project was coupled with the humanities project. It required us to make a visual aid to go with our research papers. For this assignment, we were allowed to use any artistic medium we chose. This meant that students use anything for there finial project, from paintings, to sculptures, to Photoshop posters, so long as they related to the theme of his or her paper. Because of this freedom, I chose to create a brochure in a program called Adobe In Design. While this contained the main points of my paper, it was not very visual. To fix this, I made a display involving fish plates and the pros and cons of both farmed fish and wild caught fish; thus sticking to the theme of my essay and making my section more interesting to look at.
Reflection
I chose this medium, as I already knew how to use Photoshop and Adobe In Design, and I prefer them to drawing or sculpting. I also chose this medium because I thought a brochure with the main points of my essay would best represent my paper visually. In addition to the brochure I also made a display with fish plates and the pros and cons of wild caught fish and farmed fish. I chose this medium so that I could have an even more visual piece that continued to state points of my paper and also draw attention to my entire project. I used the art principles and elements to make my point. In the plate display, I used contrast, line, and emphasis. For contrast I used dead looking plants in one part while including plant that looked alive in the other. I also used the lines the live plants created to emphasize the words taped to the plates. If I were given a chance to do this project over again, I would have started with the brochue instead of spending the begining of of the project trying to make a Photoshop poster, other than this edit I would do every thing else exactly the same way.
Egyptian Brochure
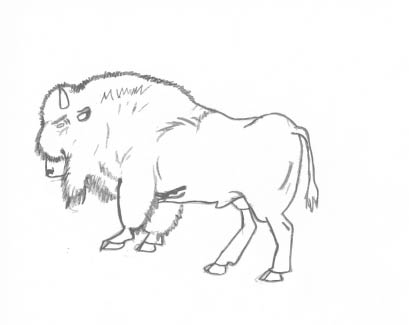
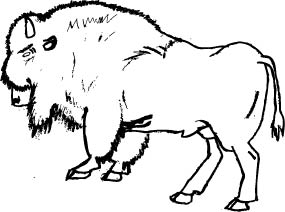
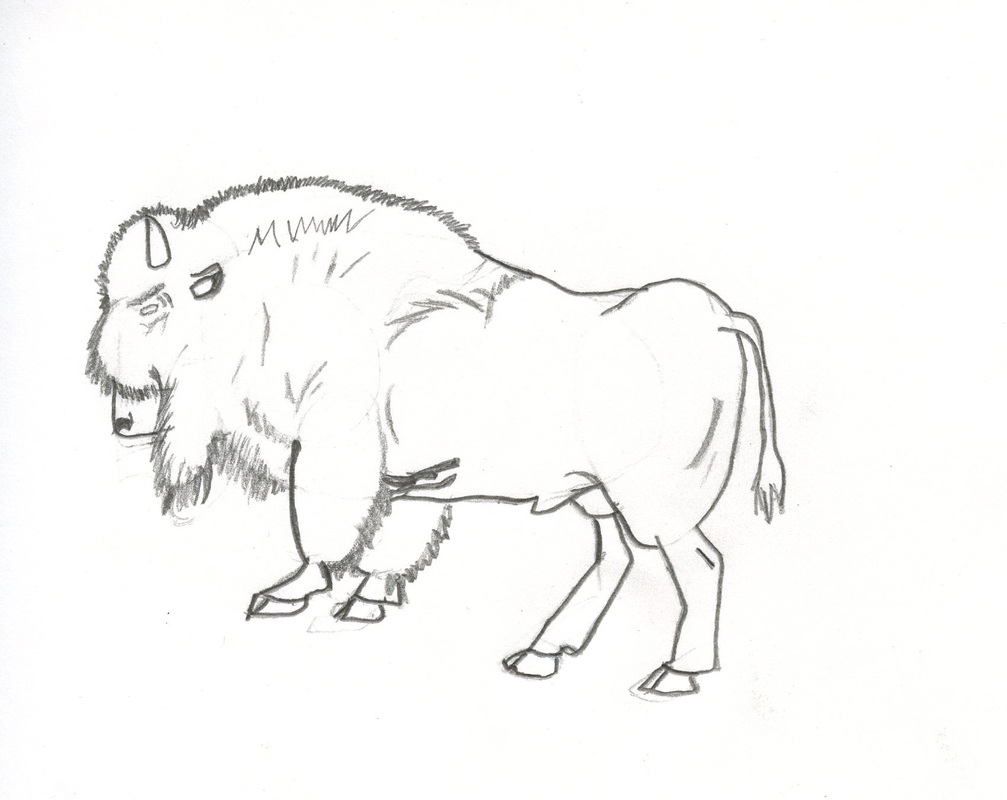
Prehistoric Drawing
|
|
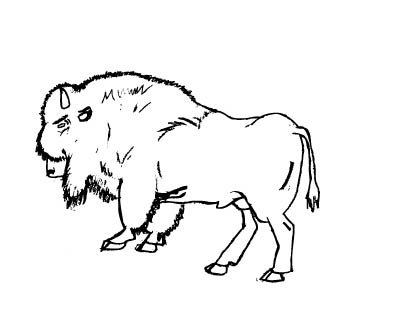
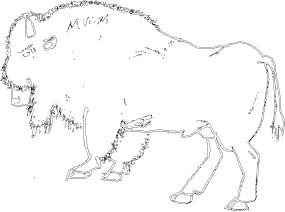
Project DescriptionFor this project, first each of us drew a picture of a prehistoric or modern animal. Once we had finished the paper version, we scanned it into the computers. Then used Adobe Photoshop to create the thresh hold version. After that we opened Adobe Illustrator and used the live trace tool to create five other versions. I created a comic art, custom, greyscale, technical drawing, and inked drawing version. This project helped us learn to use Adobe Illustrator.
|


Stop Motion Animation Project
|
|
Project Description/Reflection
This project was all about learning how to use Adobe Flash by making our own stop motion animations. Since this type of animation requires taking many pictures, first we had to learn about photo composition techniques like lighting and depth of field. (See project directly below this one.) Once we had learned about such techniques, we began to take photos for our own projects using these methods. Over the course of a few weeks, I thought I was nearly done with my photos, but then I realized that I would have to retake them all. I originally took my photos with a green screen background, but then I realized that this background would be too difficult to remove in Photoshop and had to retake all the pictures the following weekend with new backgrounds, ones I had found that were based off of planets from the Star Wars galaxy. Once the pictures were finished, I used Photoshop to resize the images so that flash wouldn’t crash when I added my pictures. After that step I made my introduction and conclusion. When I finished these sections, I converted all of my flash files into a single Windows Movie Maker movie. Very few students did this step as it was only required for those, like me, who decided to add video clips to their stop motions. Once I combined all of my scenes in this program, I began to add music and sounds to my movie. After about two days of working on this phase, I had finally finished my animation.
|
Lighting and Depth of Field Practice
Lighting
Photographers use several different kinds of lighting in order to get the effects their after. These types of light are natural light, artificial light, transmitted light, reflected light, soft light, and hard light. Natural light is light from the sun. Artificial light is light from a bulb or a flame. Transmitted light is type that occurs when you can see the light source in the picture. Reflected light is light that is reflected off a surface. Soft light is light that occurs on a cloudy day. Hard light is the kind of light that occurs of a sunny day.
This photo uses a combination of hard light, reflected light, and transmitted light. |
Depth of Field
Depth of field is the amount of the photo that is in focus.
|
Short Fiction Project: Book Cover
|
|
The designing of a book cover was the final project of the first semester. This project took place in digital arts and humanities, as we made the covers in digital arts, and we wrote stories in humanities. We made these covers to go with the stories that we wrote in humanities when they were published on the web. I made so many different versions that I had trouble narrowing it down to the one that would accompany my published story. I had to find several images online to crate these covers. First, I had to find pictures of quarters to go with the title and the Yin-Yang sign. I also had to find a silhouette and a picture of a Japanese volcano. I then combined some, or all of these elements along with text to create the many versions of my book cover. I rearranged and changed these elements until they came together in my final version which is the eleventh picture in this slideshow.
|
Book Cover Wrap Up
Q: What makes for an engaging book cover?
A: An engaging book cover is made through the art elements and principles. A good book cover needs to show something about the story in a way that does not spoil the story for the reader. It also needs to be harmonious and unified, or the cover will lose its effect. The colors, shapes, and text of the book cover must seem like they belong together to achieve this effect. In conclusion, for a cover to be effective, it must use some, or all of art principles and elements, and must engage the readers with these elements.
A: An engaging book cover is made through the art elements and principles. A good book cover needs to show something about the story in a way that does not spoil the story for the reader. It also needs to be harmonious and unified, or the cover will lose its effect. The colors, shapes, and text of the book cover must seem like they belong together to achieve this effect. In conclusion, for a cover to be effective, it must use some, or all of art principles and elements, and must engage the readers with these elements.
Q: How and why is art used as a vehicle for communication?
A: Art is used as a vehicle for communication, because it is eye catching and and interests the viewer. This is especially true in ads and billboards. These types of art are designed to interest the viewer and make them want what the ad is selling. In this manner, art is used as a form of communication, because it spans all nationalities and can inspire in people a need to buy something. Art is used as a means of communication, because it is universal and can inspire action in people, even if that action is as simple as buying something from the nearest Walmart.
A: Art is used as a vehicle for communication, because it is eye catching and and interests the viewer. This is especially true in ads and billboards. These types of art are designed to interest the viewer and make them want what the ad is selling. In this manner, art is used as a form of communication, because it spans all nationalities and can inspire in people a need to buy something. Art is used as a means of communication, because it is universal and can inspire action in people, even if that action is as simple as buying something from the nearest Walmart.
Q: To what extent does a work of art depend on the viewer's point of view?
A: A work of art depends highly on the viewer's point of view, as long as the artist plans to sell his work. If an artist wants to make money from his art, he must create works that people want to buy. All forms of public art depend on the viewer's opinion to be commercially successful. The only case where the viewer's perspective doesn't matter is if the artist doesn't care if people like his art. Art depends on the viewer's point of view almost entirely, as long as the artist wants his work to be largely popular.
A: A work of art depends highly on the viewer's point of view, as long as the artist plans to sell his work. If an artist wants to make money from his art, he must create works that people want to buy. All forms of public art depend on the viewer's opinion to be commercially successful. The only case where the viewer's perspective doesn't matter is if the artist doesn't care if people like his art. Art depends on the viewer's point of view almost entirely, as long as the artist wants his work to be largely popular.
How to Photoshop Tutorials
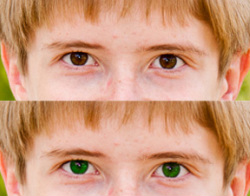
The third project done in this class was How To Photoshop Tutorials. In this project, we were able to choose how to videos from a list provided by the Digital Arts teacher and watch them. After we watched them, we used the skills that they taught to edit our own images. The tutorials I chose to watch were braces removal, eye color change, and how to download Photoshop brushes. For braces removal, I used my own picture, Photoshop, and the video to remove the front two brackets from my teeth. For eye color change I went through the same process as with the braces removal. For the Photoshop brushes, I also followed the video's instructions, but instead of editing a picture I already had, I created a new work using the plasma brushes I downloaded.
Teacher-Animal Poster Project

The second Digital Arts project was the Teacher-Animal Poster Project. For this project, we took the school photos of our teachers and edited them. For my project I took a character from Star Wars the Clone Wars, Ventris, and put my physics teacher's hair, eyes, and mouth on to Ventris's face. Some students chose to do editing directly on the picture of the teacher, but most of the class, me included, found pictures of animals, cartoon characters, or other people and simply moved the teacher's features on to the new image. This part, however, was only the beginning. We also had to find a background image for the project; I chose one from the Star Wars planet, Tatooine. This project was still not finished; we also had to find an interesting place to write our names and add another related object to the background. For my name, I made a wanted poster with my school picture and my name written across the bottom. For my related image, I put the Lars family homestead, which is seen in one of the Star Wars movies.
Name Project

This was the first project of the Animas freshman year. To start this project, we walked around the parks near our school and took pictures of objects that resembled the letters of our names. I chose not to use any of the pictures that I took at this time. Instead, I chose to use pictures that I had taken at a Boy Scout camp in the Florida Keys. We made many versions of this project. At first, I did not use the sea creature pictures and used the photos I had taken during the time we were given at school. It was not until the final version of this project that I used the images that you see here. Once we had the final version of this project, we printed the image and used rubber cement to glue it to the inside of the front cover of our sketch books.
